Friday 31 July 2015

Bokeh

Do you sometimes wish you hadn't started something! I thought I would be educational and look up the definition of Bokeh for you. Here it is according to Wikipedia:

The term comes from the Japanese word boke (暈け or ボケ), which means "blur" or "haze", or boke-aji (ボケ味), the "blur quality". The Japanese term boke is also used in the sense of a mental haze or senility.[8] The term bokashi (暈かし) is related, meaning intentional blurring or gradation.

That perhaps explains why I was drawn to have a go!!

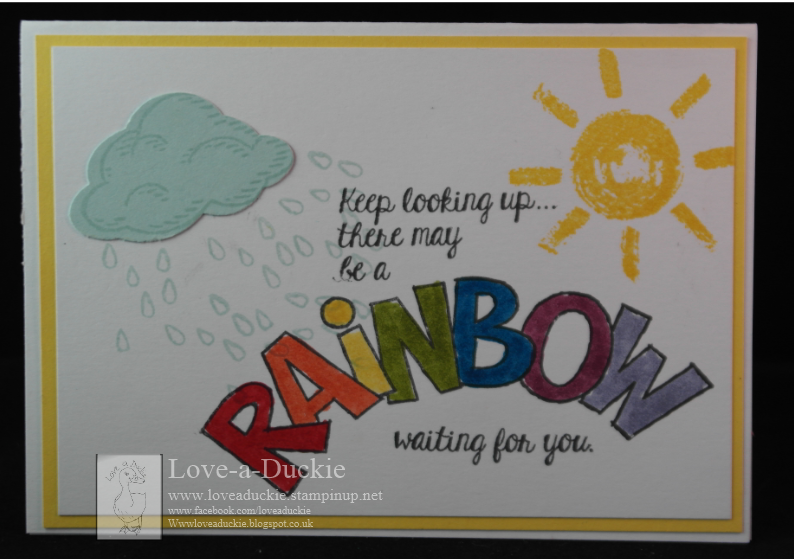
The Bokeh technique in crafting has developed from a photography technique, where a background is deliberately blurred so points of light are highlighted.
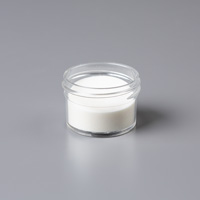
In crafting we take a bright background and add circles of white and Stampin' Up's white craft ink is brilliant for this.

I started off by creating lots of different backgrounds. they are not all Stampin'Up products, but it was fun and messy. I used ink pads, spray inks, watercolour pigment powders - all creating different backgrounds with different intensity of colours.
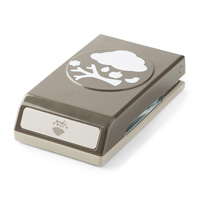
To make my stencil to add the white circles, I used a variety of circle punches and a piece of acetate. I then sponged on the craft ink, overlapping the circles and having different intensities of ink. Every piece is different and it is just fun!!!


We had a play with this technique at a recent class,and this was all Stampin Up inks blended with sponges (or daubers) or markers that were scribbled onto watercolour card and spritzed with water. You must ensure that you cover your background entirely with colour, however you decide to do it.


I highly recommend having a play. check out You Tube for a variety of technique videos.


Get Messy

Helen
xx

Thursday 30 July 2015

Christmas is coming....


We had the second of our monthly Christmas card making sessions at the Tesco group this week. We decided some time ago that we would hold a class a month to help inspire us to be prepared.
It is fantastic that there is a Christmas offering in the Annual catalogue this year. Some like this beautiful wreath and the matching dies, were a carry over from last years autumn/winter seasonal catalogue. It is a great set to use and gives a great end result.
This is a 4" square card. There are three stamps that you line up and overstamp on each other - 2 foliage and one berries. For my card I used versamark and gold embossing powder for the first 2 layers, heating the embossing powder in between. For the berries, I stamped in real red ink and added clear embossing powder. For the bow, I again stamped in real red ink onto red card and used clear embossing powder. It gave the illusion of a velvet bow. I used the joy sentiment die that comes in the set, cut out of gold card, to top it off.
The white mat has been run through the big shot with the stylish stripes folder.
A great little card and not too difficult to mass produce if you need to.

The stamp sets in the annual catalogue are not all carry overs though. For this next card I used "Santa's Gifts".

This Father Christmas passes my rigorous testing for jollyness and roundness. I coloured the images with my Stampin' markers and I used my banner punch and co-ordinating "Banner Banter" stamp set to embellish it.

Christmas has been especially on my mind this week because we have been having sneaky peeks at the new Autumn/Winter catalogue. There are some really brilliant things in it and I am very excited.I am planning some events and promotions to help you engage with the catalogue, so keep watching this space.

I have put a date in my diary to hold an open house, where you are welcome to come along between 2pm and 8pm and see the new catalogue, some of the new products and to prepare your wish lists for ordering which will go live a few days later.

Don't forget to pop this date in your diary too.


Table built using Product Table Builder by The Crafty Owl - Independent Stampin' Up! Demonstrator.


Helen
xx

Saturday 25 July 2015

Hello Life

I'm looking forward to a day crafting with a lovely group of girls, as they complete their Hello Life Project Kits.

I really enjoyed completing mine. And unlike other project kits we have done, there was no hot glue involved and so no burns.

The other really lovely thing, was the amount of pieces left over. This ,meant, with the addition of a small amount of black card and the heart confetti punch,  I was able to carry on playing to create 4 cards:


And there was still pieces left over. Dipping into my stash, I found some silver mirror card, some black bakers twine, some washi tape, some of the retired blackboard paper and some crushed curry card and carried on to complete a Project Life page layout, that now just needs some photos to finish it off.


I think it was a day well spent. I hope the girls think so tomorrow too.

If you would like to create one of these frames, it is never too late. Just get in touch.

Table built using Product Table Builder by The Crafty Owl - Independent Stampin' Up! Demonstrator.

Helen
xxx


Friday 10 July 2015

Cherished Memories

I hosted my first Project Life gathering last night and we had a lovely time, as is evidenced by my dining table this morning. We had some lovely pages developing around family, around special outings and around Prom.


It was strongly agreed that this is something we want to continue and we had some thoughts about the format going forward.

Each month before the class I will show you what style pocket we are going to be using and I will give the class a general title/theme. For those who like a creative challenge, this will hopefully lead them to pick their photographs and have some thoughts about their design. It will never be compulsory to stick to these themes. Your Project Life Album will always need to reflect your story and so I feel it is important never to restrict that, but only ever to try and help you tell it.
We always can find space for a few more around the table - or get out another table!  If you feel Project Life is something you would like to explore, do get in touch . 
The Stampin' Up catalogue has a range of Project Life kits, albums, dies and pockets and of course the main catalogue has so many papers, accessories, ribbons, dies, punches, packs of card, without all those stamps. Your Project Life pages will only ever be restricted by your imagination.

Now, I suppose I need to tidy up

Helen

Wednesday 8 July 2015

I can sing a rainbow...

With the sunshine and showers we have been having, it is not beyond possibility that you will have been treated to a beautiful rainbow. They are always so uplifting and reassuring - a sign of hope in an otherwise soggy situation.

I am loving this new stamp set that features the rainbow. It is just begging to be coloured in - and of course you have to sing the song and ensure that you do your best to get the correct colours - Richard Of York Gave Battle In Vain.
My card may have had some creative licence, but I am still collecting the Stampin' Up markers and so haven't got them all yet. I really needed the regal set for completing this job.

I have just ordered myself the set of 2014-2016 in colours, because they are in this week's weekly deals - at least they were when I checked. You have to be quick to get the bargains. Click on the link on the side bar to search them out.

My cloud is using the "Sprinkles of Life" Stamp set and matching punch. Another favourite stamp set and one which will help families whose children are having to stay in hospital, as each sale  through a Uk demonstrator leads to a donation to the Ronald McDonald house charity in the UK.

If you would like to add either of these stamps to your collection,click on the pictures below to take you through to my online shop, or get in contact with me directly.

Table built using Product Table Builder by The Crafty Owl - Independent Stampin' Up! Demonstrator.

Keep dry

Helen
xx

Tuesday 7 July 2015

What was in the Box?


A garden full of flowers and butterflies.


And as you can see from this picture taken during construction, there is room at the back for a gift card - whether it be for books, clothes, or food.


I can't take any credit for the concept of this card. One of my lovely Tesco group ladies was talking about a kit she had seen on a certain UK craft shopping channel and we pondered if it was possible to make your own.
Google to the rescue and a You Tube video from a fellow Stampin' Up demonstrator was discovered.
You can find it here and listen to the lovely Australian accent of Rachael Lewsley as she shows you how to make it.
Alternatively if you contact me I will happily email you my written instructions. It uses the envelope punch board to create the pull out tray and the trimmer was invaluable for the scoring, as some of the measurements are a little random. Like Rachael I have filled mine with flowers, but I am already pondering Christmas options. Watch this space.

This is what I used for this project:
Table built using Product Table Builder by The Crafty Owl - Independent Stampin' Up! Demonstrator.


This is not a quick project, but it is very satisfying. I hope you will give it a go.

Just a heads up about the weekly deals. they go live at just after 11pm this evening (Tuesday) Uk time and as some of the bargains are limited in quantity, if you are still awake it may be worth a browse before snuggling down to sleep. Just follow the link on the right hand side.

Have fun creating matchbox cards

Helen
xx