Monday, 21 July 2014

Tag - your it


It was a busy weekend and the training event was excellent.It has left me lots to think about and to try out. This has started with the addition of extra pages on my blog giving you all information about all elements of my Stampin' Up business and the opportunities it offers you.
Consequently my brain hurts, so just a quick post to share with you some beautiful tags I made recently. The background was created with one of the stamps from the work of art set and soft sky ink and then again using soft sky ink, the main image was stamped from the serene silhouette stamp set. The tags were shaped using the tag punch. 
These could be used to adorn a gift as well as a focal point on a card or an element on a scrapbook layout. This is one of the stamp sets that were carried over from the last catalogue - and quite right too because it is beautiful and very versatile. These are perfect for masculine cards and how about sympathy cards?
Table built using Product Table Builder by The Crafty Owl - Independent Stampin' Up! Demonstrator.

Happy Crafting
Helen
xx


Saturday, 19 July 2014

Been a hot one......

Well we have have certainly been experiencing muggy weather and fantastic storms this week. But with a fan at my side that hasn't been able to stop me from crafting this week - even if the blogging has been missing.
Wednesday saw this months "Create with cake" workshop where we worked on scrapbook pages. We used the new -in colours for our base card and the gorgeous papers from the "All Abloom" paper stack where evident all around the room. This one seems to be a hit with everyone. Here are a couple of the pages that 2 of the girls posted to Facebook. I am always amazed how the people in the group can take an idea and create something so very individual and unique.


And for those of you who are wondering this week's cakes were a mars bar slice and Anzac biscuits (not anthrax biscuits as someone thought...).

Also this week I have been getting ready for a training day I am attending tomorrow, where I will get to wallow in all things Stampin' Up. It is customary at these events to take swaps. You create a bundle of small projects, e.g. a card front and take them along. You then swap them with others there for one of there projects and by the time you come home you have a box full of inspiration from other people's crafty genius.

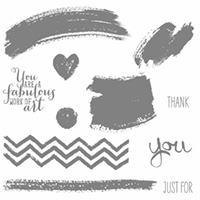
I have used the kinda eclectic stamp set for my swaps. They are still under wraps at the moment but this is a card I made using this stamp set a few days ago

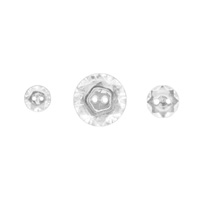
I am loving this stamp set and have a particular fondness for the leaves. I think this is a stamp set that will never have time to gather dust on the shelf. The butterflies match the two butterfly punches. Another essential item in my stash. And that row of dots, close up, have little letters running through them reminiscent of typewritten script. 
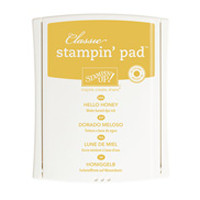
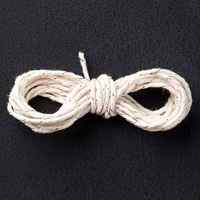
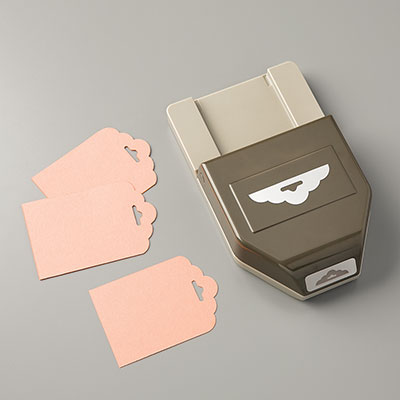
I simply stamped the sunburst stamp onto a piece of whisper white card (5cm wide) with hello honey ink. I then used my scallop tag punch to shape the end. Onto the front of the notecard I stamped some leaves in mossy meadow and the row of dotty letters in tangelo twist. The tag was added across the top using dimensionals to lift it. I have added some of the new ribbon in mossy meadow. This ribbon is beautiful and luxurious. The final touch was some butterflies, the larger butterfly stamped in tangelo twist and the smaller one in hello honey. These were then punched out and layered up and shaped.
Table built using Product Table Builder by The Crafty Owl - Independent Stampin' Up! Demonstrator.


If you want to look at any of these items in closer detail just click on the picture. Alternatively you can always browse the catalogue using the link on the right.. and while you are there check out this week's weekly deals. There are some good items in there.


Saturday, 12 July 2014

It is a girl's prerogative to change her mind.


It is always the cry of card makers everywhere that there is never enough inspiration for men's cards. Well I think there is probably even less out there for boy's cards and so I fell in love instantly with this new "Boys will be Boys" stamp set - especially those beloved building bricks. Because I am in love with my new blendabilities I also wanted to colour them in. So I coloured in the bricks and the robot and cut them out to give myself some toppers.
But I have other new things to play with. My new "Epic Alphabet" is one of the new photopolymer sets and I used cherry cobbler ink to stamp out the word "boys. The star is from this set too. I used my blender pen to colour over the letters to blend the colour very slightly.
The old olive green zig zag pattern came from the very versatile "Work of Art" set.

This is where changing my mind comes in. Originally I had created this card on one of the whisper white notecards. I added the toy toppers with dimensionals and then created a border using the coastal cabana blendability. But I didn't like it - my border was wobbly and it was lacking something. Here's a picture so you can see what I mean:

I left it to one side for a while, then this evening I went in and did some surgery.

I chopped off the border and mounted it on a 5" square of old olive patterned paper. I added a strip of daffodil yellow DSP to the bottom section and tied some cherry cobbler baker's twine around  it. I added a sentiment from the "Boys will be Boys" set. I then mounted this on old olive card and then onto a stamp shaped card blank I had in my stash. (I am sure with careful use of a circle punch you could create this effect.) I had inked the edges of the card with cherry cobbler ink.


I am now much happier with the result. If at first you don't succeed.........

Here's the ingredients list for this project:

Table built using Product Table Builder by The Crafty Owl - Independent Stampin' Up! Demonstrator.


Happy Crafting Everyone

Helen
xx


Friday, 11 July 2014

I love colouring in.


I love this new peacock stamp and it just called to me to colour it in with my new blendabilities. It is important to use the right ink to stamp your image when using alcohol markers or you could end up with lots of blurred, smudgy edges. Memento ink is the one for the job and both the ink pad and a refill bottle can be found in the new catalogue.


I don't yet have a darker blue collection -the night of navy set won't be out for another couple of weeks, so I used both the coastal cabana and the old olive sets to bring in some variety to the feathers.
I am still developing my skills, so there was a little bit of bleeding around the edges, but that is the perfect excuse to colour another peacock another day.


I mounted the picture on some mats of daffodil yellow and coastal cabana card to match the colours I used colouring the peacock and I thought this paper from the moonlight designer series paper stack worked beautifully. All that was needed was to pop on a sentiment.

Peacocks are such beautiful creatures to look at,but leave a lot to be desired in the vocal department. I suppose that is a lesson to us all - to focus on the talents and the gifts we have been given. None of us can be good at everything.

If you love colouring in too, why not check out the new blendabilities range and some of the stamps that have been introduced to complement them.

Table built using Product Table Builder by The Crafty Owl - Independent Stampin' Up! Demonstrator.

Wednesday, 9 July 2014

What's in the weekly deals this week?

Weekly Deals by Stampin' Up!
Below you can find the links to this weeks weekly deals. Gold velum; silver bakers twine; the fabulous chevron ribbon in smoky slate; glass type vintage buttons and the journal and matching washi tape. As always there is a collection from the digital selection. Something for everyone to slip in if your placing an order to boost your stash and save a few pennies.

Table built using Product Table Builder by The Crafty Owl - Independent Stampin' Up! Demonstrator..


I haven't been into the office today as I have had to change my days around this week.This has meant I have been busy working in my craft room and have been experimenting with lots of my new stamps and products. I have particularly enjoyed playing with my new blendabilities. These are Stampin' Up's new alcohol markers. Some of the colours have been released and the rest are to follow very soon. I love the fact that they come in packs of 3 shades of the same colour, which means you are able to shade and blend really easily. There are lots of videos popping up on "how to", but here is a link to the one Stampin' Up produced. 

Check out the range in my online store here and look out over the next day or so for where I have been using them. There is nothing quite so relaxing as colouring in.


Well I suppose I had better force myself back to the craft table lol!!

Helen
xxx