Saturday, 25 July 2015

Hello Life

I'm looking forward to a day crafting with a lovely group of girls, as they complete their Hello Life Project Kits.

I really enjoyed completing mine. And unlike other project kits we have done, there was no hot glue involved and so no burns.

The other really lovely thing, was the amount of pieces left over. This ,meant, with the addition of a small amount of black card and the heart confetti punch,  I was able to carry on playing to create 4 cards:


And there was still pieces left over. Dipping into my stash, I found some silver mirror card, some black bakers twine, some washi tape, some of the retired blackboard paper and some crushed curry card and carried on to complete a Project Life page layout, that now just needs some photos to finish it off.


I think it was a day well spent. I hope the girls think so tomorrow too.

If you would like to create one of these frames, it is never too late. Just get in touch.

Table built using Product Table Builder by The Crafty Owl - Independent Stampin' Up! Demonstrator.

Helen
xxx


Friday, 10 July 2015

Cherished Memories

I hosted my first Project Life gathering last night and we had a lovely time, as is evidenced by my dining table this morning. We had some lovely pages developing around family, around special outings and around Prom.


It was strongly agreed that this is something we want to continue and we had some thoughts about the format going forward.

Each month before the class I will show you what style pocket we are going to be using and I will give the class a general title/theme. For those who like a creative challenge, this will hopefully lead them to pick their photographs and have some thoughts about their design. It will never be compulsory to stick to these themes. Your Project Life Album will always need to reflect your story and so I feel it is important never to restrict that, but only ever to try and help you tell it.
We always can find space for a few more around the table - or get out another table!  If you feel Project Life is something you would like to explore, do get in touch . 
The Stampin' Up catalogue has a range of Project Life kits, albums, dies and pockets and of course the main catalogue has so many papers, accessories, ribbons, dies, punches, packs of card, without all those stamps. Your Project Life pages will only ever be restricted by your imagination.

Now, I suppose I need to tidy up

Helen

Wednesday, 8 July 2015

I can sing a rainbow...

With the sunshine and showers we have been having, it is not beyond possibility that you will have been treated to a beautiful rainbow. They are always so uplifting and reassuring - a sign of hope in an otherwise soggy situation.

I am loving this new stamp set that features the rainbow. It is just begging to be coloured in - and of course you have to sing the song and ensure that you do your best to get the correct colours - Richard Of York Gave Battle In Vain.
My card may have had some creative licence, but I am still collecting the Stampin' Up markers and so haven't got them all yet. I really needed the regal set for completing this job.

I have just ordered myself the set of 2014-2016 in colours, because they are in this week's weekly deals - at least they were when I checked. You have to be quick to get the bargains. Click on the link on the side bar to search them out.

My cloud is using the "Sprinkles of Life" Stamp set and matching punch. Another favourite stamp set and one which will help families whose children are having to stay in hospital, as each sale  through a Uk demonstrator leads to a donation to the Ronald McDonald house charity in the UK.

If you would like to add either of these stamps to your collection,click on the pictures below to take you through to my online shop, or get in contact with me directly.

Table built using Product Table Builder by The Crafty Owl - Independent Stampin' Up! Demonstrator.

Keep dry

Helen
xx

Tuesday, 7 July 2015

What was in the Box?


A garden full of flowers and butterflies.


And as you can see from this picture taken during construction, there is room at the back for a gift card - whether it be for books, clothes, or food.


I can't take any credit for the concept of this card. One of my lovely Tesco group ladies was talking about a kit she had seen on a certain UK craft shopping channel and we pondered if it was possible to make your own.
Google to the rescue and a You Tube video from a fellow Stampin' Up demonstrator was discovered.
You can find it here and listen to the lovely Australian accent of Rachael Lewsley as she shows you how to make it.
Alternatively if you contact me I will happily email you my written instructions. It uses the envelope punch board to create the pull out tray and the trimmer was invaluable for the scoring, as some of the measurements are a little random. Like Rachael I have filled mine with flowers, but I am already pondering Christmas options. Watch this space.

This is what I used for this project:
Table built using Product Table Builder by The Crafty Owl - Independent Stampin' Up! Demonstrator.


This is not a quick project, but it is very satisfying. I hope you will give it a go.

Just a heads up about the weekly deals. they go live at just after 11pm this evening (Tuesday) Uk time and as some of the bargains are limited in quantity, if you are still awake it may be worth a browse before snuggling down to sleep. Just follow the link on the right hand side.

Have fun creating matchbox cards

Helen
xx


Monday, 6 July 2015

What's in the box?


This surprise package is all ready to be revealed at the Monday Afternoon Class in Tesco Community Room. So if you want to see the reveal, or better still, make one yourself, then do come and join us at 1pm.

I will reveal what was inside tomorrow.....

Sunday, 5 July 2015

Birthday Girl

Just a quick post in the middle of a very busy weekend to share the card I made for my daughter's birthday yesterday. Lovely bright colours used to stamp the fun "Build a Birthday Stamp, the vibrant Cherry on Top Paper Stack , pumpkin pie cardstock, yellow ribbon and punched circles of card given a make- over to add a bit of shine. Although blossomed into a beautiful woman now, she was always a smiley baby and child and hence was always my little ray of sunshine, so it had to be a card with colours to reflect that.

Table built using Product Table Builder by The Crafty Owl - Independent Stampin' Up! Demonstrator.

Back to my busy weekend, hope you are enjoying yours

Helen

Thursday, 2 July 2015

Bargains and balloons

and bloomin' hot. If I haven't lost 3 stone in weight today, there is no justice in this world. I am sure I must have melted away just a little bit.
Hope you have managed to find ways to keep cool and craft on.

Firstly don't forget to check out the weekly deals. There are going to be extra goodies this week and throughout July, but some will only be there while allocated stocks last. There are also new items in the clearance rack. I don't want you to miss a bargain.

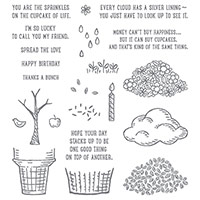
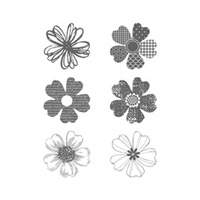
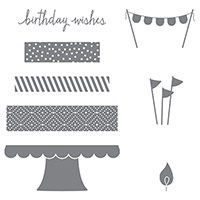
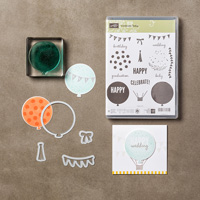
I thought I would share with you today some cards I made with this brilliant balloon bundle. It consists of photopolymer stamps, with balloons, decorations, bunting and greetings and also a matching side of dies.


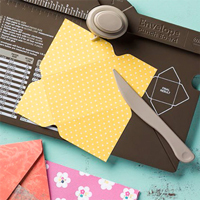
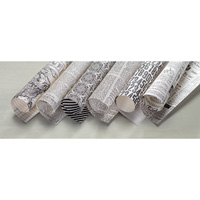
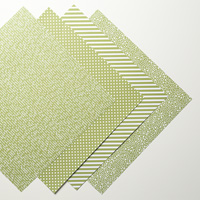
For this card I die cut 3 balloons out of the typeset specialty dsp, folded them in half and stuck them back to back to create the 3D balloon. I stamped the basket onto the bottom of some card, which I inked around the edge with black ink.  I also stamped the Happy Birthday before attaching the balloon. I covered the front of my notelet with matching speciality DSP. I wrapped some metallic twine around opposite corners of the topper before attaching to the notelet.


This cute is to welcome a baby into your life. I added baby bunting to my stamped balloon before layering it up with melon mambo card and pink pirouette DSP. The"dots" I created from melon mambo card.

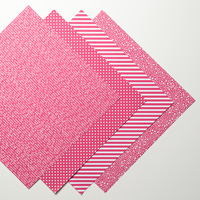
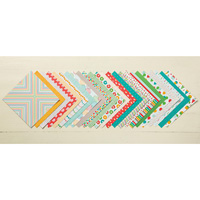
For the main image on this card I die cut the balloon from the front of a notelet and then added strips of bright DSP behind it. Although this is the now retired stack of bright DSP, the new, even better version would work splendidly. I finished it with stamped stars, blue bunting and matching banners - oh and a bit of faux stitching, just because I am addicted.

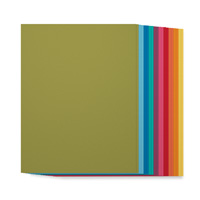
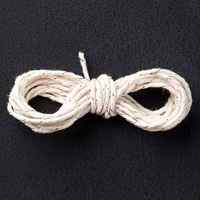
For these balloons I die cut balloons from bright card, then added spots with the dotty stamp, versamark and white embossing powder. They had linen thread strings and were mounted on a background I had spritzed with ink refill diluted in rubbing alcohol and a mount of tempting turquoise card. A "celebrate" banner finished it off.

As wise old Winnie the Pooh says:


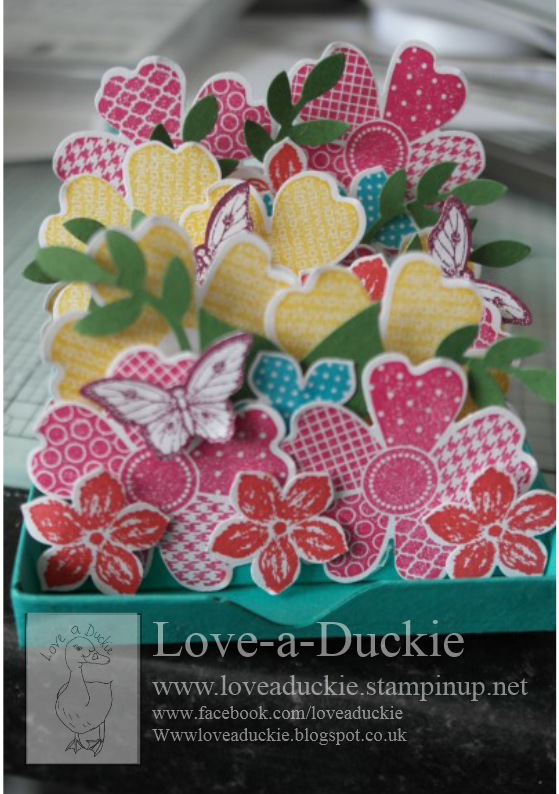
Balloon are fabulous for so many occasions and this bundle is definitely a must have.


Table built using Product Table Builder by The Crafty Owl - Independent Stampin' Up! Demonstrator.


Hope you are able to enjoy the summer sunshine and if it gets too hot outside, plug in your fan and craft with Wimbledon on the telly and a big bowl of strawberries at your side. Lovely

Helen