Friday, 3 June 2016

They'll have you in a swirl

One of the first bundles I was able to get my hands on was the swirly bird stamp set and the co-ordinating swirly scribbles dies. When I first saw them, I thought they looked quite odd. However, when you start playing they are very addictive and there are endless possibilities of pictures and shapes you can create. Crafting should be fun and this set certainly is that.


I concentrated on playing with the new in-colors ready for my launch party last weekend and I am pleased with how they turned out. I have pinned a lot of inspiration on my pinterest board here. For starters I still need to play with more boats, bigger flowers, heat embossing,different inking techniques, the swirls, kites......

Why not check them out for yourself.

Table built using Product Table Builder by The Crafty Owl - Independent Stampin' Up! Demonstrator.


Right, back to playing

Helen
xx

Thursday, 2 June 2016

Some Highlights of the last Stampin' Up Year

I thought as we celebrated the launch of the new catalogue, that I would pause a moment and smile at some projects I enjoyed in the last Stampin' Up year.

First 3 very different cards;

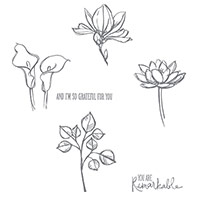
The first uses very neutral shades and the wonderful Botanical Blooms stamp set. The very tropical nature of this set means it tends to be used in bright, bold colours. It was fun therefore to tone it right down and use a neutral palette to produce a card that would suit a man as well as a lady.


The second card used DSP, that beautiful lace ribbon, the sweet little coat hanger die from "Baby's First framelits and the "Beauty" came from the "Enjoy the Little Things" stamp set. The score board was also put to good use to create the panelled effect on the background.A lovely card that uses lots of different product.


And the third card employed a technique which I had enormous fun doing. Embossing wax paper and then ironing it onto shiny card to create a wax resist. I explain the process a little more in my blog post here

Next some more dimensional projects. I had great fun with the range of balloon stamps, dies and punches we had to create these bold box frame cards, that would look fabulous on a child's bedroom wall. 


And for something a little more genteel, I created this gift set containing tea, coffee, hot chocolate, biscuits and sugar using the suite of products from the Spring/Summer catalogue. We made them at a product led class and at least one became a present for Mother's Day


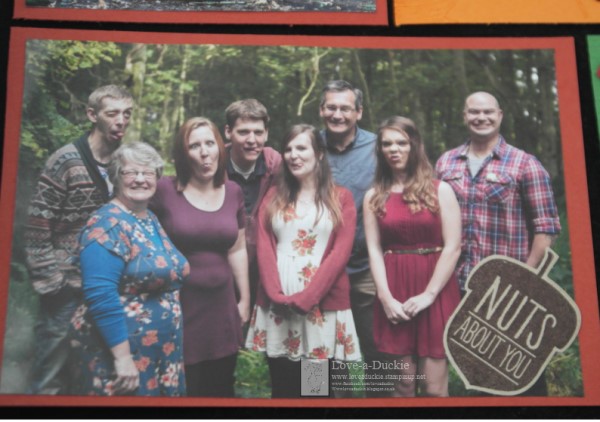
And last, but by now means least, a Project Life page using some of the beautiful pictures we had taken as part of a Family Photo shoot that our children bought my husband and I as a gift for our 50th Birthdays which both fell last autumn. The photos were taken in the wood in early autumn, so it seemed appropriate to play with the vintage leaf set and to use autumn colours for this page.


I hope you have enjoyed this little nostalgic journey, but now hold onto your hats, because the journey into the new Stampin' Up year starts here.

Hope you'll enjoy the ride along with me.

Helen
xx


Wednesday, 1 June 2016

The most exciting day in the Stampin' Up year


After a lot of waiting and anticipation, the new annual catalogue has officially launched today and it is possible to now order the fabulous goodies inside.

Let's have a quick whistle stop tour of some of my favourites - this list is by no means exhaustive and changes by the minute! The cover gives you a fantastic taster of the five new in-colours:
Flirty Flamingo
Sweet Sugarplum
Emerald Envy
Dapper Denim
Peekaboo Peach


The new ruched ribbon in the 5 new in colours is gorgeous. It makes fabulous bows. 

There is a lovely stamp set to go with these feathered beauties

These dies are just gorgeous - and look out for the Paper collection that is part of this particular suite of products


There are 3 ombre ink pads. Exciting!!!

This picture doesn't do justice to these fabulous photograhic quality papers in the handy 6"x6" stack

There are 4 collections of these layering dies- circles, ovals, squares and hearts. They are going to be endlessly useful.

I have not had a chance to try this baby yet, but it is a new base plate that has been designed especially to eliminate the problem of a drop in pressure in the centre of your cutting area that happens with all die machine. Especially useful with the more intricate dies, Mines ordered and I can't wait to try it.


These cuties speak for themselves and we have a Saturday Stamper workshop in June. Check out the classes tab here


And this bear is just so yummy too.

The new Project Life collections are just stunning.

If you would like a paper copy of the catalogue please get in touch. You can head over to my online shop if you want to get an order in, or contact me directly

If you have a long wish list check out my monthly club here and spread your orders over the next few months, whilst earning free product.

You can look at the online catalogue, just by clicking on the link on the right.

Enjoy browsing

Helen
xx


Thursday, 5 May 2016

It's a Man's World


The Going Places suite of products in the Spring/Summer Catalogue are fabulous for creating those sometimes difficult masculine cards. There are papers, embossing folder and stamps in the collection. This first card was created using a topper I created in Brussels last November when we were first introduced to this catalogue.
The background was created by inking up an embossing folder and using it as a stamp. The stamp depicting the plough was then stamped on top. The world map was stamped onto a circle of paper and paper from the stack created the banner strips, 


Some more paper, banners and stamps to create this one.


The photograph doesn't do this card justice. Gold mirri card was embossed with the world traveller embossing folder. The globe stamp and the sentiment were gold embossed on black card. A length of black bakers twine was wrapped around the card front.

Table built using Product Table Builder by The Crafty Owl - Independent Stampin' Up! Demonstrator.


I have a few classes coming up using some of these products to create some cards that will be suitable for Father's Day and other celebrations for the men in our lives. It would be lovely to see you there.

Helen

Wednesday, 4 May 2016

Velum in soft focus


It has been a while since I posted, as there has been lots of excitement in our family over the last month with the arrival of a new Granddaughter.
Today I thought I would share with you a couple of cards we made at a class using velum. I love the soft focus effect you get when using velum.
This first image was stamped with versamark and then heat embossed in silver. I then turned the velum over and used blender pens and ink to colour the flower, making the colour stronger where I wanted shading. The difficulty with using velum is attaching it to your card without the adhesive showing. For this card I cut some corner pieces from blushing bride card to cover where I placed the adhesive. The greeting banner was also cut from blushing bride card and the sentiment embossed with silver powder to coordinate with the main image. Some wisps of silver metallic thread were added behind the greeting banner and some pearls were dotted around to finish.


This 2nd card features the beautiful peacock stamp that we are going to be saying goodbye to this month. This time I used brads to attach the velum to a piece of white card, before attaching the topper to a black card blank.A bow, a banner and some rhinestones gave the finishing touches. I am going to miss seeing this peacock in the catalogue - although there will of course be new friends to make.

Here are some of the products I used in my cards. If you click on them they will take you directly to my online store. While you are there check out the retiring list and make sure you pick up all the lovely products that once they are gone, are gone for good.

Table built using Product Table Builder by The Crafty Owl - Independent Stampin' Up! Demonstrator.

As always I hope you will have a play with this technique yourself. 

Helen
xx