

We were recently having fun with different techniques using embossing folders. Stampin' Up have a lovely collection of textured embossing folders and it is always nice to explore different ways of using them and different materials to use in them.
These are just a couple of projects I created.
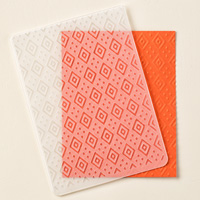
The fist involved die cutting shapes from several pieces of card to create frames and then sticking the card layers together to create a mask. You place the card to be embossed in the folder as usual. You then lay this directly on the base plate of your big shot, with all the tabs closed. The mask is laid on top of the embossing folder and then just one of the cutting pads is placed on top. The pattern from the embossing folder is only transferred to the card in the folder at the points where the mask is laid on top. This gives you an embossed frame with a blank inner. You can reverse this by sticking together the frame shapes that you cut out to create another mask. You will then get an embossed inner and plain outer frame. These are so many possibilities.

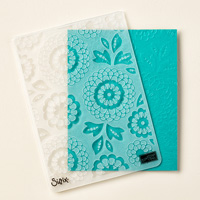
For this second card I ran some vellum through an embossing folder. This gives a beautiful lace effect. I simply tore around the edges of the pattern.
There are so many other materials you can play with - foil, aluminium cans, heated funky foam.
Don't take your embossing folders for granted. Get them out and experiment with different materials, inks and techniques. We will come back to them in a future blog to look at other ideas.
 |
 |
 |
 |
 |
 |
 |
Table built using Product Table Builder by The Crafty Owl - Independent Stampin'
Up! Demonstrator.
Have fun
Helen
xx
No comments:
Post a Comment