Wednesday, 24 June 2015

Bouquet finale

Well today has been a busy one, with crafting all the way. The evening was finished off nicely with 3 lovely ladies at the last of my sessions with the now retired Bouquet kit. Some pansies, poppies, daisies, chrysanthemums and wild roses were created and at least one blister gained from a hot glue gun, but they are well on there way now to completed bouquets. I have been promised pictures of the finished articles when they are finally completed. Hopefully they will find something nicer that the beer glasses we used on our crafting table, to display them in. 

The next all day workshop will be creating this beautiful display rack. There are paper pompoms to make, frames (including a shaker frame) to create  bunting to decorate. It should be a good day. It is on 18th July, 10am-3.30pm at All Hallows' Church Hall, Market Square, Wellingborough. The cost is £35 to include all the kit and equipment you need to complete the project. Bring your lunch,but drinks and cake will be provided.
Contact me to book a place by 4th July, so I can order your kit.


Tuesday, 23 June 2015

Happiness is a beautiful stamp set

The weekly deals have gone live and they include this beautiful stamp set at a bargain price. It is on my wish list, because I haven't succumbed yet. Have you? Follow the link on the page to check out the other deals this week. there is another couple of must have stamps.

Table built using Product Table Builder by The Crafty Owl - Independent Stampin' Up! Demonstrator.

Monday, 22 June 2015

Paper samples


At my recent catalogue launch event, I offered my customers the opportunity to purchase some sample packs of all the beautiful new designer series paper packs and this was quite popular, so I am extending the opportunity to you.
The packs normally come as 12"x12" papers, 12 sheets, 2 each of 6 double sided designs. I am offering sample packs of 12 sheets of 6"x6" papers, 12 sheets, 2 each of 6 double sided designs.
The large packs are £10 each, so naturally the sample packs are £2.50. However, if you order one of each of the eight packs, I am offering you them for £18, a saving of £2.
This gives you an opportunity to browse, feel and yes -smell the lovely papers and decide if you would like to purchase a complete pack.


If you are interested in this promotion, then do get in touch with me.

Helen
xx

All that glitters


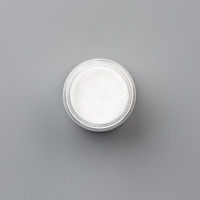
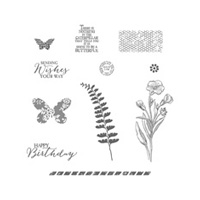
We had great fun this afternoon at the Love-a-Duckie craft group, which is held every Monday afternoon in Tesco's Community Room at Victoria Park, Wellingborough. We were playing with Stampin' Up's heat and stick powder.You use it like an embossing powder; first stamping the image in Versamark ink, before sprinkling on the white, quite coarse powder. When heating it with the heat gun you have to be careful not to overheat it, just long enough for it to change from white to a clear tacky adhesive. You are then able to add bling. Stampin' Up do some pretty glitter in gold, silver and dazzling diamond. However, like many of us, over the years I have collected a myriad of colours in glitter and we delved into my box to see what we could find. The swallowtail butterfly was covered in a rose pink,whilst the peacock was suitably adorned in blue.
The fern from the butterfly basics set was also given the glitter treatment.


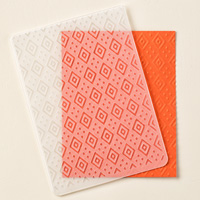
The main image was sprinkled with a holographic glitter which gave it a green tint on the black card. The glitter border was created by first laying down a border of double sided tape and then covering with blue glitter. I added an embossed background to this card, using the new boho chic folder. The sentiment also came from the Butterfly Basics stamp set.

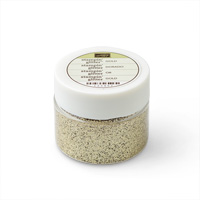
To ring the changes, I again used the same fern stamp, but I dug back into my stash and found some gilding flakes. Unfortunately Stampin' Up don't stock these pots of loveliness, but they gave us the heat and stick which allowed us to play with them.

 On this Gold colored fern,I added the mesh image from the Butterfly basics set and embossed it with gold embossing powder. I drew a border with the gold and silver pens which are now retired.

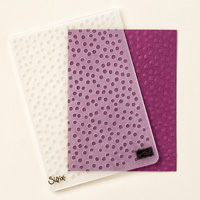
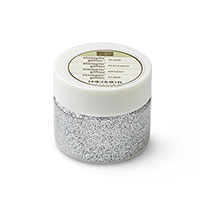
For the background on this silver fern, I inked the decorative dots embossing folder with versamark, before running it through my big shot.I then sprinkled on the heat and stick, heated it and added gilding flakes.

My little pot of heat and stick went a long way and I can see it be used a lot as we start to think about Christmas projects. 
I also think it is good to remind ourselves that our Stampin' Up products are fabulous on there own, but they can also help us to breathe new life into things that are sitting at the back of our craft cupboards.

Table built using Product Table Builder by The Crafty Owl - Independent Stampin' Up! Demonstrator.

Do get in touch if you are interested in any of these products.

Have fun with your crafty stash

Helen


Thursday, 4 June 2015

been gone so long


Hi. I haven't posted on here for so long and even this is a flying visit. I have updated all the pages and links, so check out all my classes, the new catalogue and the weekly deals. 


And also don't forget to come along to the drop in to celebrate the launch of the new catalogue.


Wednesday, 11 February 2015

Spots and stripes

Well three days on and I am still far from feeling tickety boo. However, armed with a box of tissues and sitting huddled under a blanket, I will share a couple more of our card fronts that were created using the stencils from the "Dots and Stripes"set.


This first card used both stencils. I masked off the part of the card I wasn't working on and lay the striped mask from corner to corner. I used the rich razzleberry ink pad directly to ink through the stencil, which is why the colours on this are deeper. I then masked off the other side of the card and lay the dot mask on and inked directly using the melon mambo inkpad. To make the toppers, I used the "Amazing Birthday" stamp set to stamp the birthday cake which I layered onto a circle punched from rich razzleberry card stock. I added white dots using the chalk marker. Using the same stamp set I stamped the Happy Birthday greeting and then layered it onto a tag punched from melon mambo card stock. The whole card front was then mounted onto melon mambo card stock.


This second example, used the stripe stencil. I lay it one way across my white card and sponged through with daffodil yellow ink. I then wiped the stencil before turning it around by 90% and sponged through with pacific point ink. I picked up those colours to create the tag, which is the striped banner stamp and the surprise stamp, both from the "Amazing Birthday" collection. I layered them up onto a die cut tag in pacific point card stock. I used dimensionals to attach it to the card front. I then added a piece of knotted yellow ribbon. The whole was then mounted onto a square of pacific point ink.

One of these cards is in quite "girly" colours, whilst the other is quite masculine. It is always fun finding different ways to creating tour own bespoke backgrounds, not just for cards, but for journals and home decor as well.

Table built using Product Table Builder by The Crafty Owl - Independent Stampin' Up! Demonstrator.

I am going to snuggle back under my blanket and continue to try and get better.

Helen

Sunday, 8 February 2015

Ridiculously amazing


Another day, another stencil card. I really loved creating this background - very therapeutic. I got the idea from a You tube video featuring an American Stampin' Up demonstrator - Julie Davison (you can view it here ). She in turn had been inspired at a Stampin' Up convention. So now it is your turn to be inspired.
You simply take a selection of stampin' write markers and using the dots stencil and the thin end of the marker, you draw around the circle and then doodle in the centre -dots, stripes, spots, scribble, cross-hatch - whatever takes your fancy. For my card front I used daffodil yellow, tempting turquoise, melon mambo and pumpkin pie to create my doodled spots on a piece of whisper white cardstock. I backed my card onto a piece of melon mambo card stock. I then made the greeting tag by using the same markers to colour this fabulous stamp from the "Amazing Birthday" set (not forgetting to "huff" on the stamp before stamping it.) I then cut it out and backed it onto melon mambo card stock, before attaching it on an angle, with dimensionals. I finished off with a piece of  melon mambo cotton ribbon. A beautifully bright, yet simple card and a technique that the children might like to try (even if you don't let them use your stampin' write markers!)

Table built using Product Table Builder by The Crafty Owl - Independent Stampin' Up! Demonstrator.


I am feeling very sorry for myself today - cough, headache, runny nose. It hasn't kept me away from my craft room though. Perhaps this is just the cure I need. Playing with my crafty toys and planning more classes and workshops. Do check out my classes page on the blog to see a current list of planned events.

Hopefully by the time I am back with you i shall be feeling tickety-boo. I have been watching old episodes of Call The Midwife - I love that expression! Perhaps we need a stamp?

Helen