Monday, 3 August 2015

Simply Sublime Darling

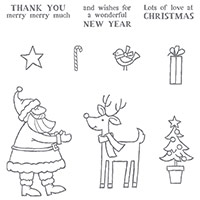
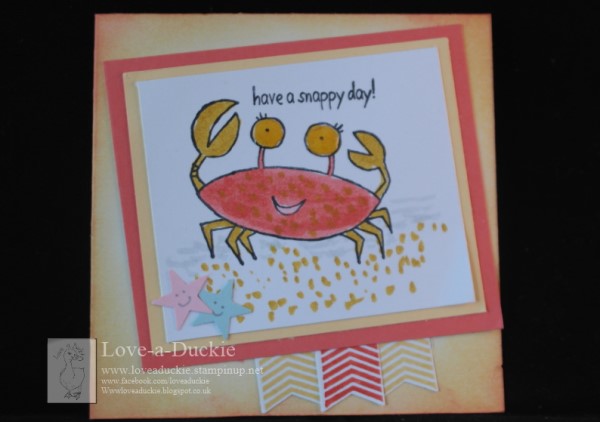
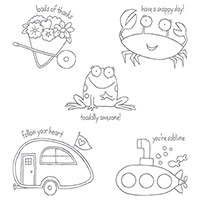
I recently found myself with an unexpected free evening and I decided I would have a play with this stamp set - "You're sublime"

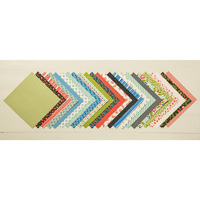
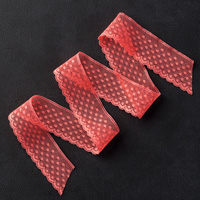
It is a fun little set with lots of potential uses. I decided to get out my Stampin' Markers and some crystal effects and with the addition of some 4" square card blanks, some mats of card and DSP, some punches and ribbon, I was away.

On this one I embossed the card mat and punched out a heart which I stuck on top of the bow. I added crystal effects to the heart and the caravan windows to glaze them..

The crab had glazed eyes and punched stars with smiley faces. I also added some stamped and punched banners.


I stamped and glazed some small circles for embellishments and glazed the portholes.


The toad also had glazed eyes, punched stars for embellishments and bakers twine

The wheelbarrow had punched flowers with rhinestone centres and a bow.


I had a lovely evening playing with this set. It would also be a good set for children to play with during these summer holidays. I can also see potential for some paper piecing with this one - perhaps for another day.

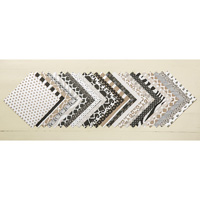
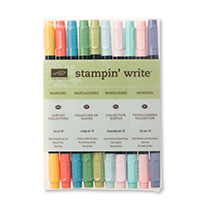
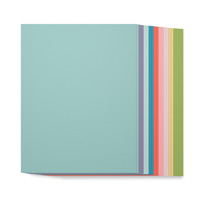
Here are some of the supplies I used.Some of the ribbon is now retired, but not forgotten.


Table built using Product Table Builder by The Crafty Owl - Independent Stampin' Up! Demonstrator.

Hope your Monday is bright and cheery

Helen
xxx

Sunday, 2 August 2015

Waterfall

Back in ancient history, when I was first cardmaking, it seemed that waterfall cards were everywhere and very popular. They then seemed to disappear.
I have noticed, however, a resurgence in their popularity and so we decided to have a play the other Monday afternoon in our weekly group.

A couple of the cards I created as demonstration pieces had waterfalls that opened horizontally, like this one using the "Barnyard babies" stamp set for the toppers. the "Amazing Birthday" stamp set to stamp the "surprise" inside and the "Pretty Petals" DSP stack. 


And this one using the "Guy greetings"stamp set and "Go Wild" DSP stack.


For my third demonstration card I created a vertical waterfall, taking my inspiration from a card I found on Pinterest. You can see it here


This card used the fabulous "Sprinkles of Life" stamp set, that is the set you can buy and also support the Ronald McDonald house charity in the UK.. I also got to add in some of the beautiful watermelon wonder dotted lace trim. For this card I cut square toppers for the waterfall elements, stamped them and then trimmed around the top of the ice cream to give it its shape.

There are lots of instructions and videos available to help you create a waterfall card. Check out this one here as it has an easy mechanism system. 

If you have never made a waterfall card, then I highly recommend you give it a go.

Here are some of the supplies I used, but they can be created to fit any theme and for any one.

Table built using Product Table Builder by The Crafty Owl - Independent Stampin' Up! Demonstrator.

Have fun

Helen
xx


Saturday, 1 August 2015

Brussels here i come

 This is a tiny little joy fold card that I made for swaps at a Stampin' Up training event I attended a while back.


It reminded me that I am going to have to design and create lots of swaps for November, because I am going along to the "On Stage" event that is being held in Brussels. It is the first of a new style of international conventions that Stampin' Up are staging and I am very excited.


I am really blessed to have so many wonderful opportunities come my way through being a Stampin' Up Demonstrator - and this is the most exciting so far. The accommodation is booked, the Eurostar ticket and my Convention ticket.

Over the last week, I have been able to preview all the new goodies in the up coming seasonal catalogue and have been able to dream of stamp sets and chocolate in Brussels ( what a fab combination). If you think this is the life for you, then talk to me about what is involved in becoming a demonstrator and  check out the tab at the top of the page for more information. 

Helen
xxx


Friday, 31 July 2015

Bokeh

Do you sometimes wish you hadn't started something! I thought I would be educational and look up the definition of Bokeh for you. Here it is according to Wikipedia:

The term comes from the Japanese word boke (暈け or ボケ), which means "blur" or "haze", or boke-aji (ボケ味), the "blur quality". The Japanese term boke is also used in the sense of a mental haze or senility.[8] The term bokashi (暈かし) is related, meaning intentional blurring or gradation.

That perhaps explains why I was drawn to have a go!!

The Bokeh technique in crafting has developed from a photography technique, where a background is deliberately blurred so points of light are highlighted.
In crafting we take a bright background and add circles of white and Stampin' Up's white craft ink is brilliant for this.

I started off by creating lots of different backgrounds. they are not all Stampin'Up products, but it was fun and messy. I used ink pads, spray inks, watercolour pigment powders - all creating different backgrounds with different intensity of colours.
To make my stencil to add the white circles, I used a variety of circle punches and a piece of acetate. I then sponged on the craft ink, overlapping the circles and having different intensities of ink. Every piece is different and it is just fun!!!


We had a play with this technique at a recent class,and this was all Stampin Up inks blended with sponges (or daubers) or markers that were scribbled onto watercolour card and spritzed with water. You must ensure that you cover your background entirely with colour, however you decide to do it.


I highly recommend having a play. check out You Tube for a variety of technique videos.


Get Messy

Helen
xx

Thursday, 30 July 2015

Christmas is coming....


We had the second of our monthly Christmas card making sessions at the Tesco group this week. We decided some time ago that we would hold a class a month to help inspire us to be prepared.
It is fantastic that there is a Christmas offering in the Annual catalogue this year. Some like this beautiful wreath and the matching dies, were a carry over from last years autumn/winter seasonal catalogue. It is a great set to use and gives a great end result.
This is a 4" square card. There are three stamps that you line up and overstamp on each other - 2 foliage and one berries. For my card I used versamark and gold embossing powder for the first 2 layers, heating the embossing powder in between. For the berries, I stamped in real red ink and added clear embossing powder. For the bow, I again stamped in real red ink onto red card and used clear embossing powder. It gave the illusion of a velvet bow. I used the joy sentiment die that comes in the set, cut out of gold card, to top it off.
The white mat has been run through the big shot with the stylish stripes folder.
A great little card and not too difficult to mass produce if you need to.

The stamp sets in the annual catalogue are not all carry overs though. For this next card I used "Santa's Gifts".

This Father Christmas passes my rigorous testing for jollyness and roundness. I coloured the images with my Stampin' markers and I used my banner punch and co-ordinating "Banner Banter" stamp set to embellish it.

Christmas has been especially on my mind this week because we have been having sneaky peeks at the new Autumn/Winter catalogue. There are some really brilliant things in it and I am very excited.I am planning some events and promotions to help you engage with the catalogue, so keep watching this space.

I have put a date in my diary to hold an open house, where you are welcome to come along between 2pm and 8pm and see the new catalogue, some of the new products and to prepare your wish lists for ordering which will go live a few days later.

Don't forget to pop this date in your diary too.


Table built using Product Table Builder by The Crafty Owl - Independent Stampin' Up! Demonstrator.


Helen
xx