Thursday, 11 February 2016

Nearly time to go


Isn't it funny how you can suddenly love something even more if you know it is soon not going to be around anymore. That is very true for two products I have used in this project. Both are part of the sale-a-bration free product offering this year and both are going to cease to be available after 15th February.

This "The sky's the limit" set is fabulous and this airplane has so much potential. Here it has been stamped and heat embossed with black embossing powder. I also really like the font and style of the greeting stamps. The 2 sizes of clouds come in the set as well as a heart shaped "loop the loop" smoke trail. I am going to miss this one - but I've got mine. If you need one too make sure you hurry. 

The  other product is the backing paper - here in grey. One side has a watercolour effect and the other (as shown) is a marble effect. I admit to being unsure when I first saw it, but now I have started using them I am hooked. Glad I still have an unopened pack in reserve.

Here is another very different card I have made today using these papers.


The third set that was only available until the 15th February is the "Hello"set. A jolly little sentiment set with added accessories. Who wouldn't want a hat on their hello.

If you would like any of these items, you can only get them through placing an order for £45 from either of the current catalogues, so scan those wish lists and get in touch quickly.

Table built using Product Table Builder by The Crafty Owl - Independent Stampin' Up! Demonstrator.

Have a crafty day

Helen
xx


Tuesday, 9 February 2016

Embossing Folder techniques


We were recently having fun with different techniques using embossing folders. Stampin' Up have a lovely collection of textured embossing folders and it is always nice to explore different ways of using them and different materials to use in them. 
These are just a couple of projects I created.
The fist involved die cutting shapes from several pieces of card to create frames and then sticking the card layers together to create a mask. You place the card to be embossed in the folder as usual. You then lay this directly on the base plate of your big shot, with all the tabs closed. The mask is laid on top of the embossing folder and then just one of the cutting pads is placed on top. The pattern from the embossing folder is only transferred to the card in the folder at the points where the mask is laid on top. This gives you an embossed frame with a blank inner. You can reverse this by sticking together the frame shapes that you cut out to create another mask. You will then get an embossed inner and plain outer frame. These are so many possibilities.


For this second card I ran some vellum through an embossing folder. This gives a beautiful lace effect. I simply tore around the edges of the pattern.

There are so many other materials you can play with - foil, aluminium cans, heated funky foam.

Don't take your embossing folders for granted. Get them out and experiment with different materials, inks and techniques. We will come back to them in a future blog to look at other ideas.

Table built using Product Table Builder by The Crafty Owl - Independent Stampin' Up! Demonstrator.

Have fun

Helen
xx

Saturday, 6 February 2016

Weekly deals - Under the Tree


There are some beautiful things in the weekly deal offering this week, not least amongst them is the "Sheltering Tree" set. I have used a variety of stamps from it to make up this simple card.
 I have inked the background with soft sky and wild wasabi inks. The tree trunk was stamped in soft suede, the leaves in wild wasabi and the blossom in blushing bride. The clouds were added in soft sky and the grass again in wild wasabi. The bike and sentiment were both stamped in basic gray archival ink.
This set is so versatile and can take you through the seasons and for so many different occasions.

It is not the only gem in this weeks offerings though. The pearls are quite literally a gem - adhesive at that. I used one to finish of this card:

And there are some Christmas offerings in there as well, including the gorgeous delicate ornaments thinlet dies


and the wondrous wreath stamp set.


Do go and check them all out here

Helen
xxx


Thursday, 4 February 2016

A Nice Cuppa


Each Thursday I am planning to share something I am loving at the minute with you all in Blog Land. 
If you know me at all, you will know I love a nice cuppa, so this bundle is right up my street and I adore it all - the stamps, the dies, the papers and the contrasting embellishments. I haven't spent nearly enough time playing with it,but here is a couple of designs I have produced so far.
This first one is picking up the bright Bermuda bay and Melon Mambo colours from this particular paper. I have used both sides of this particular sheet - the hearts are the main background and the more subtle cross pattern forms the strip across the middle. Perhaps i should have added one of the gorgeous little charms to the bottom of the bow - but I am still loving looking at them and am not quite ready to commit one to a project.
Doesn't this stamp just say it all! I have a mug which says - I haven't room to be sad,I am too full of tea. This stamp would also be brilliant on home decor pieces for your kitchen.


For this second pair of cards, I used some different paper from the same collection and some kraft card. Also this time I used the coordinating dies to cut out my stamped images. The heart on the front of the cups is another die, as is the little tea bag tag. Some faux stitching was added with my white gel pen, and I also drew in the string that dangled over the side of the cup to the the tea bag label.

There is a day workshop coming up on Saturday 20th February using this collection,so why not come and join us. I am going to have great fun creating projects ready for you.

Here are the items from this suite of products. Click on them and it will take you through to my shop. Alternatively just contact me directly.

Table built using Product Table Builder by The Crafty Owl - Independent Stampin' Up! Demonstrator.


Right Must be time for tea!!

Helen
xx

Wednesday, 3 February 2016

Sharing my story

Hi

I thought I would just pop in today and share something of my Stampin' Up story and my hopes and dreams.

Just over 2 years ago, I was busy with my family, my part time job as a family support worker and my Church activities... but I had a dream.
For over 12 years I had been cardmaking. From humble beginnings with peel offs and the excitement of first encountering heat embossing, my supplies and my experience had grown. I watched demonstrators on television and at craft events. I read magazines and followed people on line. My dream was to somehow turn my spare time passion into a dream job. Two years on and I am living that dream.
There were 2 things that helped me to make that happen. Several years ago I had heard about Stampin' Up and had even put my name down at a craft event to receive some more information about becoming a demonstrator, but I heard nothing. A couple of years down the line and Stampin' Up again came to my attention through a magazine and I felt this really may be a stepping stone in allowing me to build a career out of my hobby. This time I emailed a local demonstrator and she swiftly responded. We booked a party in the diary and very soon after hosting my own party I signed up to receive my starter pack. Choosing that starter kit was so exciting. I sat with my catalogue knowing I was spending £99, but that I had an actual budget of £130 to spend on anything I wanted. I had nothing to lose. If it didn't work out for me Stampin' Up were not going to chase after me to return the extra benefits I had received from this kit. It was mine to develop as I chose.
I began to tentatively dip my toe in the water and booked a couple of parties and held a few crafting get togethers. This continued for nearly a year and then the second event happened to change my path. The charity I was working for had to close its doors because of funding drying up and I was made redundant. I decided it was now or never and so with my husband's blessing I concentrated my efforts on building my business and to see what I could achieve with Love-A-Duckie.
The months since the beginning of November 2014 have sped by and the duck continues to waddle on and I continue to have hopes and dreams. I have already met so many lovely people and have received so much support from other Stampin' up demonstrators, but I want to continue to spread the love.

I would love to find more opportunities to meet more people and to share with them my excitement about Stampin' Up products and the benefits to the wellbeing of all people of all ages that crafting brings.

I would like to build my team - other people who would like to use Stampin' Up's fabulous sign up offers to fulfill their dreams - whether they dream of a full-time career, a well-stocked craft room for themselves, or anything in between.

I would love to identify people who would like to gather a group of family or friends to spend a couple of hours crafting - and for the hostess a chance to earn free products for themselves.

To welcome more people who would love to join us for my classes and workshops. These are always relaxed and fun occasions which are suitable for anyone from new crafters to those more experienced. They are a chance to use fabulous products to create beautiful projects.

If you are someone who is considering shopping with Stampin' Up, hosting a party, or signing up as a demonstrator, there is no better time to do it than between now and the end of March. Sale-a-bration is in full swing and it brings lots of benefits.

If you are shopping - for every £45 you spend from either the annual or the spring/summer catalogue you can choose one of the free sale-a-bration items. It is the only way to get these exclusive products.


If you are hosting and your party has £200 or more in sales, you will be able to choose an additional £20 in free product on top of the normal Stampin' rewards you earn. You can even use these rewards towards purchasing a starter kit.


If you are 
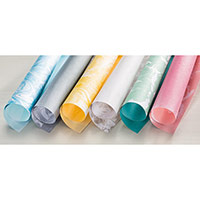
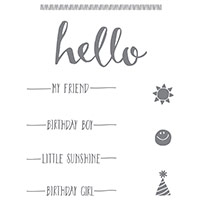
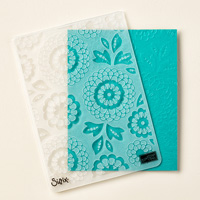
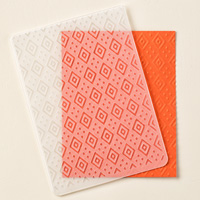
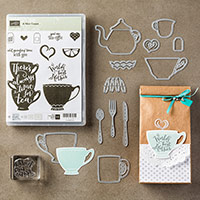
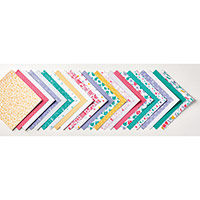
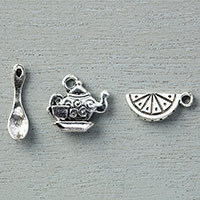
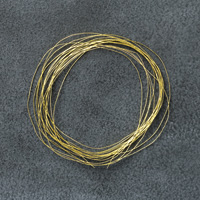
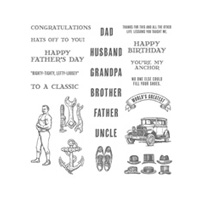
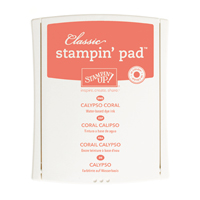
joining as a demonstrator, you can get £160 worth of product of your choice for your £99 starter kit ( a whole £59 worth of free goodies) There are targets you have to meet in order to maintain your demonstrator status, but if you find after you have bought your starter kit that you are unable to achieve these targets there are no repercussions and you don't have to return any of the additional items. And if you are able to continue to build on your demonstrator role there are so many benefits to becoming a member of the Stampin' Up family - the people you meet, the discounts, the Stampin' Up social network and gatherings, a chance to see new catalogues and products early - and to order them! What have you got to lose? Think what that additional £59 will do to your wish list. For example you could have all this free:


.
Tempted?
Wondering what the catch is?
Have you got a dream that Stampin' Up could help you to realise?

Contact me for a no obligation chat. Let us help each other fulfill our dreams.

Helen
xx


Tuesday, 2 February 2016

Blocks and Bands


In a recent class, we had some fun playing with a couple of techniques using the acrylic blocks to create backgrounds and these are using just one of those techniques. Using an assortment of thick and thin elastic bands, we experimented with wrapping the bands around the blocks, before inking them up and printing the resulting pattern. This first example had thin bands criss crossed across a square block and the pattern was repeated several times in Calypso coral ink. I then added some coordinating washi tape, ribbon,  a banner greeting and a button. Some of the metallic gold thread was wrapped around the ribbon and threaded through the button. Simple but effective.


This second example was created using a mixture of thick and thin elastic bands on a long block to  give this chequered pattern. The stars were punched from coordinating card and the topper stamped using the "Guy greetings" stamp set and "Gorgeous Grunge". Some mini brads gave the finishing touch.

If you are struggling to find those wider elastic bands, it may be worth stalking your postman to see if any pop out of his pocket.

Hereare some of the products I used. Do contact me if you would like to order any.

Table built using Product Table Builder by The Crafty Owl - Independent Stampin' Up! Demonstrator.


We will explore some other block techniques another day.

Helen
xx