

Over the last 24 hours or so I have been feeling a bit grotty with a sore throat and sniffles, but nevertheless I headed off to my Craft Group at Long Buckby on Wednesday night, because I had promised the girls glitter.
I had recently put out an appeal for take-away type boxes to create glitter stations and so I headed out with stamps, ink, embossing powder and of course Stampin' Up's beautiful ultra fine glitter.
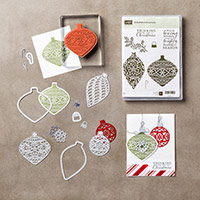
By far the most popular stamp set was this "embellished ornaments" with its matching thinlits. They are utterly gorgeous and just the thing for glitter.
For this first card I die cut one ornament from gold dsp from the neutrals paper stack. The second bauble I cut from double sided adhesive sheet which I had first stuck to copier paper. Once cut I peeled off the second carrier sheet and lay it in my glitter and made sure it was well coated. I then cut an outline from some acetate and stuck this to the back of the glittered die cut. For both baubles I die cut the top hanging section in gold mirri card. Onto an A6 card blank I attached a mat created from gold mirri card and some gold vellum from the winter wonderland designer vellum stack. I used glue to stick the vellum on in the four corners. I then attached the 2 baubles and the greeting from the stamp set, which I had embossed with gold embossing powder. The glittery domes in each corner were created by forming blobs of hot glue from a hot glue gun on a non-stick mat, which I then sprinkled with glitter. Once attached they covered the glue under the vellum. This picture doesn't do justice to the sparkle in this card.
Here are some other cards created with this bundle.
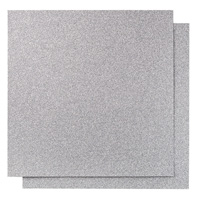
I stamped the baubles for this second card, die cut them with the outline die, covered them with versamark and then sprinkled irridescent ice embossing powder over them. This really gives them some bling. They are hanging from the holly boughs in the stamp set, The hanging elements in this card are cut from silver glimmer paper.


This 3rd sample is a really simple card made up of 4 die cut baubles which I have mounted onto circles of silver mirri card. I have placed a panel of snowflake acetate in the centre of a DL card. Although this is from my stash you could create the snow using a white gel pen, or white acrylic paint. I stuck the bauble top and bottom with glue, but each bauble has a mini brad through the hanger so it looks like these are how the baubles are hung. A simple greeting was stamped onto the bottom of the card.

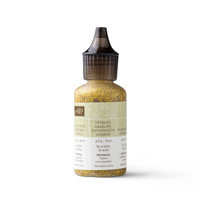
This little bauble is simply made up of die cut elements - cherry cobbler card for the back and the flower element and gold mirri for the decorative front and hanger. All that was left was some dazzling detail in gold for the centre of the flower. Now shall I turn it into an ornament, or a card topper?

 |
 |
 |
 |
 |
 |
Table built using Product Table Builder by The Crafty Owl - Independent Stampin'
Up! Demonstrator.
We had great fun with this bundle and I have so many more thoughts buzzing in my head for how I could use it, just need to shake off these dreaded germs and find a few more hours in the day.
Helen
xx
No comments:
Post a Comment